
When your website was set up, you will have been given the following:
|
Details of how to access your new website |
|
|
Private URL |
This will be a private URL to access your website until it goes live |
|
Web Site Login |
Your admin website login |
|
Web Site Password |
Your admin website password |
|
|
|
|
Details of how to access your new web services |
|
|
Web Service URL |
This will be a URL for accessing the web services |
|
Web Service Login |
Your web service login |
|
Web Service Password |
Your web service password |
|
|
|
|
Details of how to access your new FTP site |
|
|
FTP IP Address |
This will be an IP address to access your ftp site |
|
FTP Login |
Your ftp login |
|
FTP Password |
Your ftp password |
|
|
|
Logging in as Website Admin
To log in, simply go to your new website using the temporary URL you have been given and click on the LOGIN link in the top right corner of your website (if you are not already brought to the login page). Then, enter your login and password and log into the website.
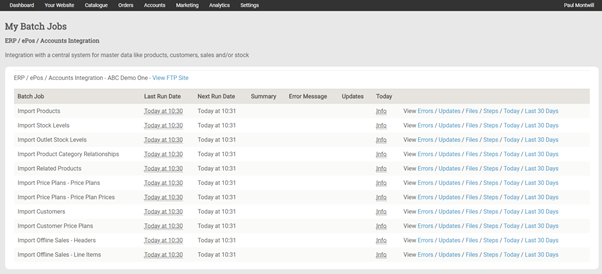
Viewing your Batch Jobs
After you log in, you will see a new black ADMIN menu bar appear across the top of the page. This contains all the admin screens that you can now access. Under the ANALYTICS & REPORTS menu option, click on YOUR BATCH JOBS which will bring you into a screen that you can view the status of all your batch jobs.
This screen will initially list all your integration batch jobs starting with IMPORT PRODUCTS and their status (see example screenshot below). You will see that none have a NEXT RUN DATE set for them as the batch jobs have not yet been turned on. Before we turn this on, we need you to set up a regular upload of the CSV files to the INBOX folder in your FTP site – including the PRODUCTS csv file and the PRODUCT CATEGORY RELATIONSHIPS csv file.
Comments
0 comments
Please sign in to leave a comment.