
The following is a guide on how to web enable products within WinRetail.
All products that have Enable for Web clicked will automatically upload to the website within 30 minutes. Note that if the product is NOT ACTIVE or is DISCONTINUED, then the product will not be exported to the website (or will be made inactive if it's already on the website).
Web enabling a product
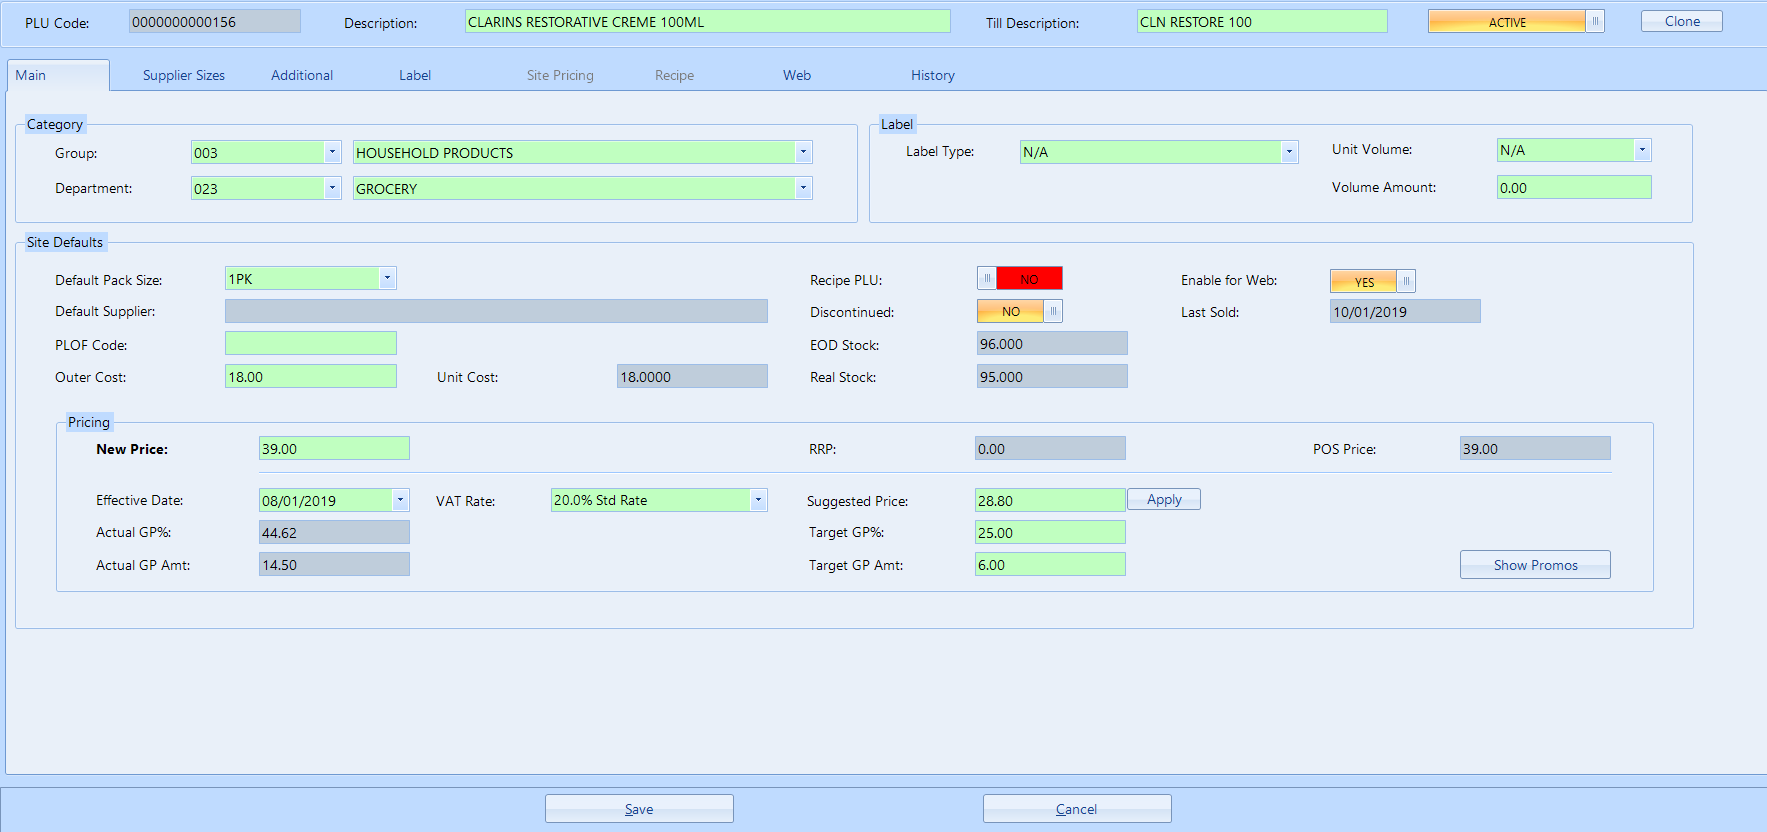
Once you have located your product, go to PLU edit screen
Locate Enable for Web (see screen below) and select Yes
Choose the WEB tab from the top menu bar, you will see the following screen:
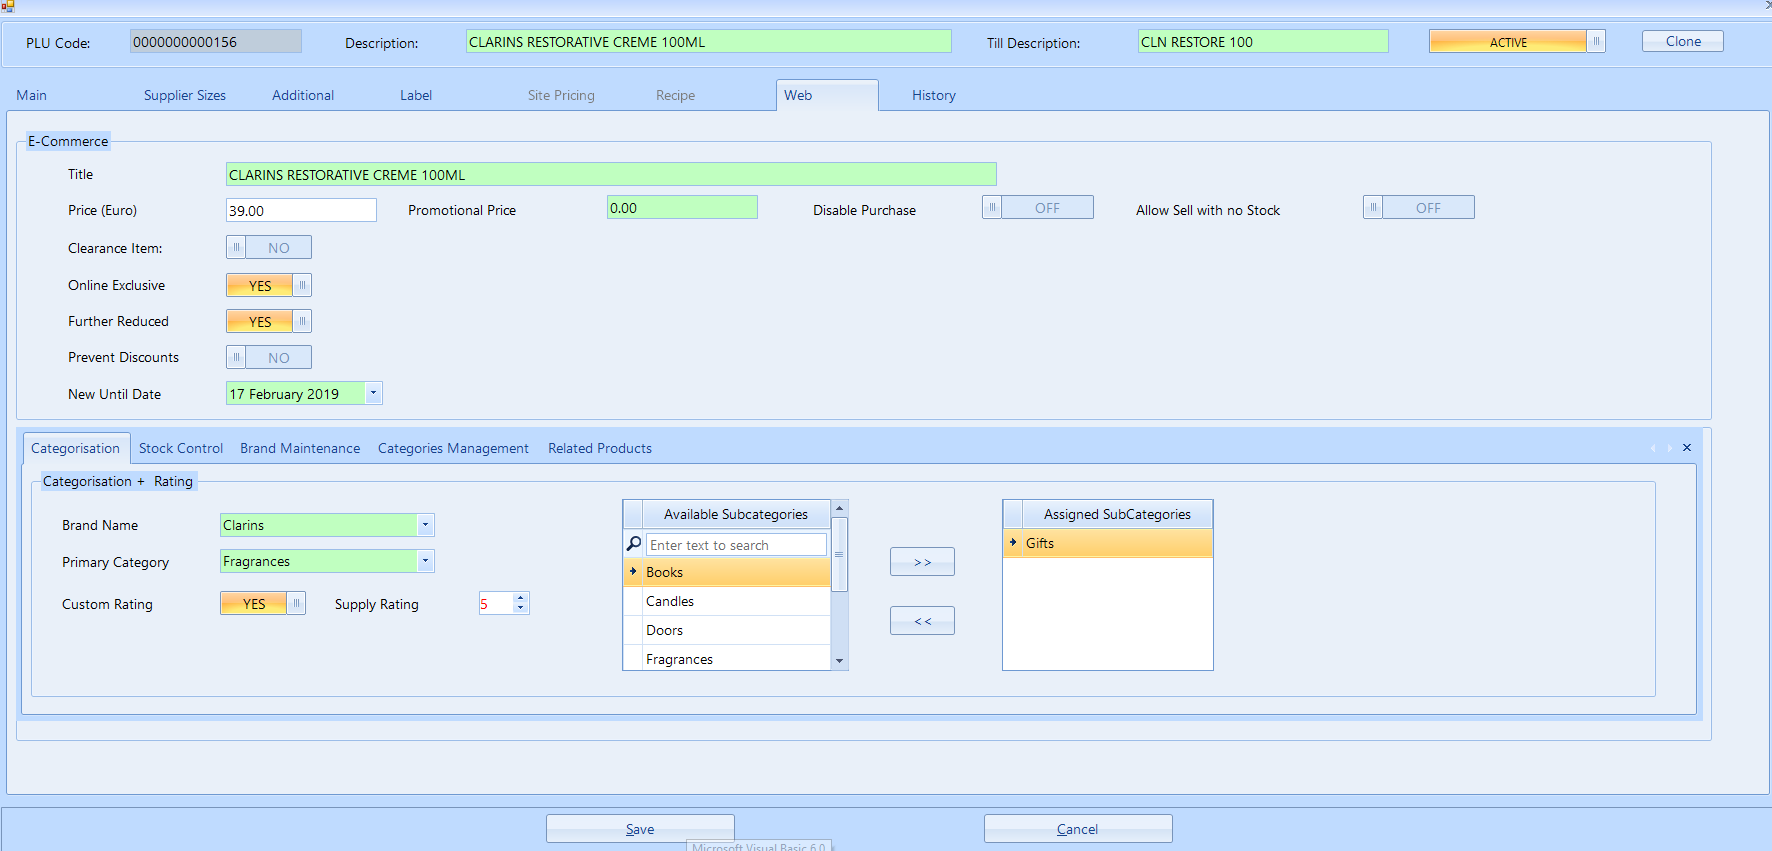
The following fields are available in this screen:
eCommerce
- Title -this will default to the till title (which has a maximum of 35 characters) - you can overwrite this title with up to 100 characters if you want a different or longer title to appear on the website, we would recommend user friendly titles on the web
- Promotional Price - if you set a value in this field, you can turn on a promotion price on the website (which is shown as a "Was - Now" price)
- Disable Purchase - If you would like to show a product on the website but not allow the user to add it to the basket, check this box
- Allow Sell No Stock - If you would like the ability to sell a product that show zero stock e.g Gift Voucher
- Clearance Item - If you want a Clearance icon to appear on the product, check this
- Online Exclusive - If you want an Online Exclusive icon to appear on the product, check this
- Further Reduced - If you want a Further Reduced icon to appear on the product, check this
- Prevent Discounts - If you want the product to be excluded from promotions on the website by default, check this box
- New Until Date - The website will automatically show the product as being NEW when it appears on the website for a set number of days (the default is 45 days) - if you want to override this default, enter it here
Categorisation & Rating
Important Note : If a product(s) will become part of a group on the website e.g a version of a lipstick DO NOT assign the product(s) to a Brand or Primary category. This is because the brand and primary category will be added to the parent product on the website.
- Brand Name - Select the brand for this product - you can update the brands under the Brand Maintenance tab (see below)
- Primary Category - Select the primary category for this product. Ensure that you had the lowest level of category eg if you have a FACE category under the MAKE UP category you will add FACE as the primary category. The primary category must be a category that appears in the main navigation of the website. You can update the website categories under the Categories Management tab. (see below)
- Custom Rating - The products will automatically have a default sort order of the best selling products at the top for all lists of products on the website. If you want to overwrite this and push certain products to the top of the search, check Custom Rating and enter a number between 1 and 1,000 with the product having 1 appearing first, 2 appearing second, and so on.
- Related Products - You can create a Custom Related Products list, see below
- Assigned SubCategories - You can also add further categories by moving them into AssignedSubCategories, for example a product may have FRAGRANCE-WOMENS as its primary category but you could also add it to a GIFTFINDER-GIFTSFORHER category. These appear on the the website as Additional Categories (see the Categories tab of the product in CATALOGUE - PRODUCTS). If your category structure is well thought out there will be no need to add a product to lots of AssignedSubCategories.
Automated Best Sellers
With the "Custom Rating" algorithm described above, the products in the top 20% of top selling products automatically get a BEST SELLER icon applied to it. You can contact CBE to get this percentage changed to a lower or higher percentage - or you can ask them to remove it if you want to set the BEST SELLER products yourself manually.
Stock Control
When you click on the Stock Control tab, you will see the following:
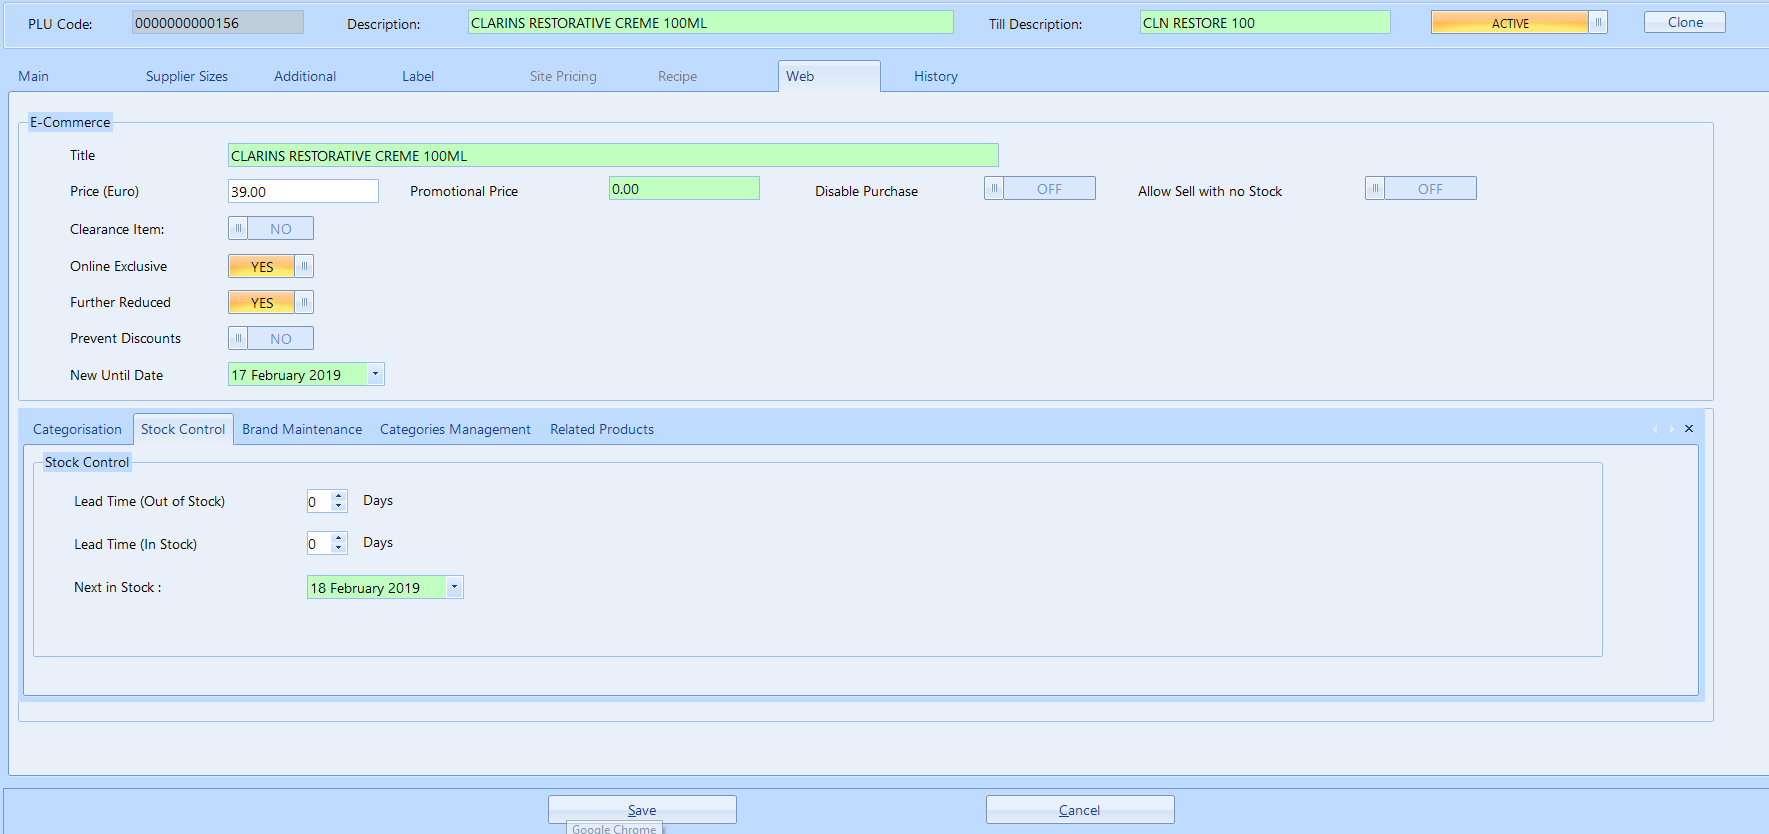
- Lead Time (Out of Stock) - This is the number of days to get a product that is out of stock back in stock - if a number is entered here (e.g. 4 Days), the website will always show this product as being In Stock and if it's out of stock, it will show In Stock (Allow 4 working days for delivery)
- Lead Time (In Stock) - This is the number of days to allow for a product that is in stock so if you have a website banner stating Next Day Delivery but this product will take longer to deliver when it's in stock, enter the number of days here - e.g. if you enter 2 Days, it will show In Stock (Allow 2 working days for delivery)
- Next in Stock - If you don't use Lead Time (Out of Stock) above, the product will show Out of Stock when the product is out of stock. If you would like it to show Out of Stock - Next in: 1 Jan 2020, enter the Next in Stock date here.
Brand Maintenance
To Add, Edit or Delete a Brand choose the Brand Maintenance Tab
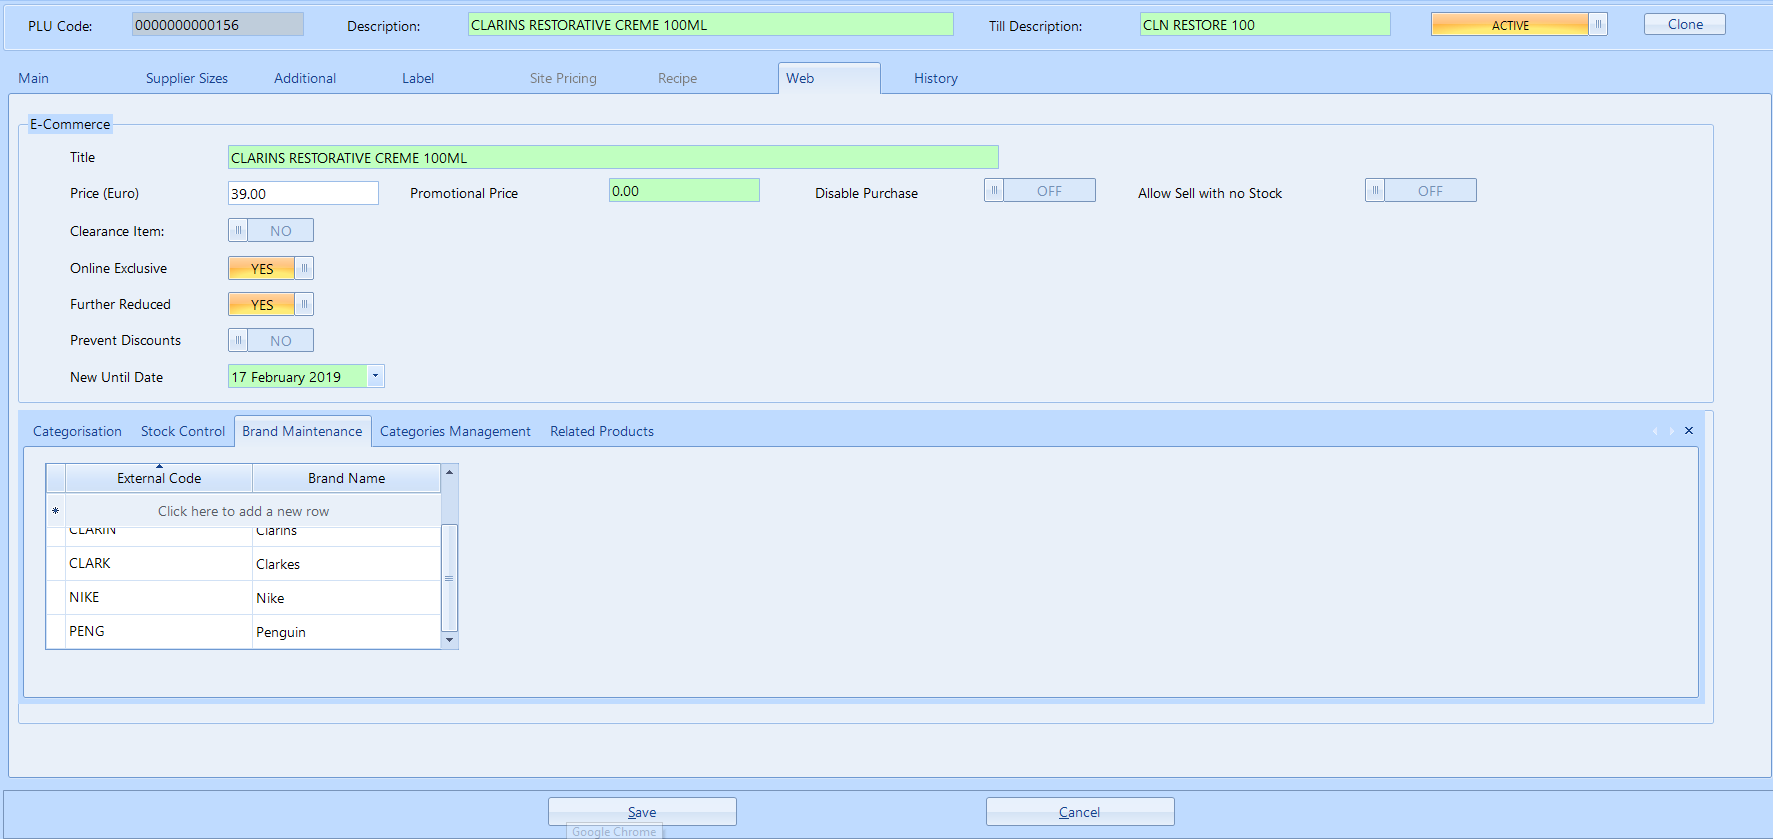
- Click here to Add a New Row
- Enter an External Code, this must match the Brand Category External Code in abcommerce
- Enter the Brand Name
Category Maintenance
To Add, Edit or Delete a Category choose the Category Maintenance Tab
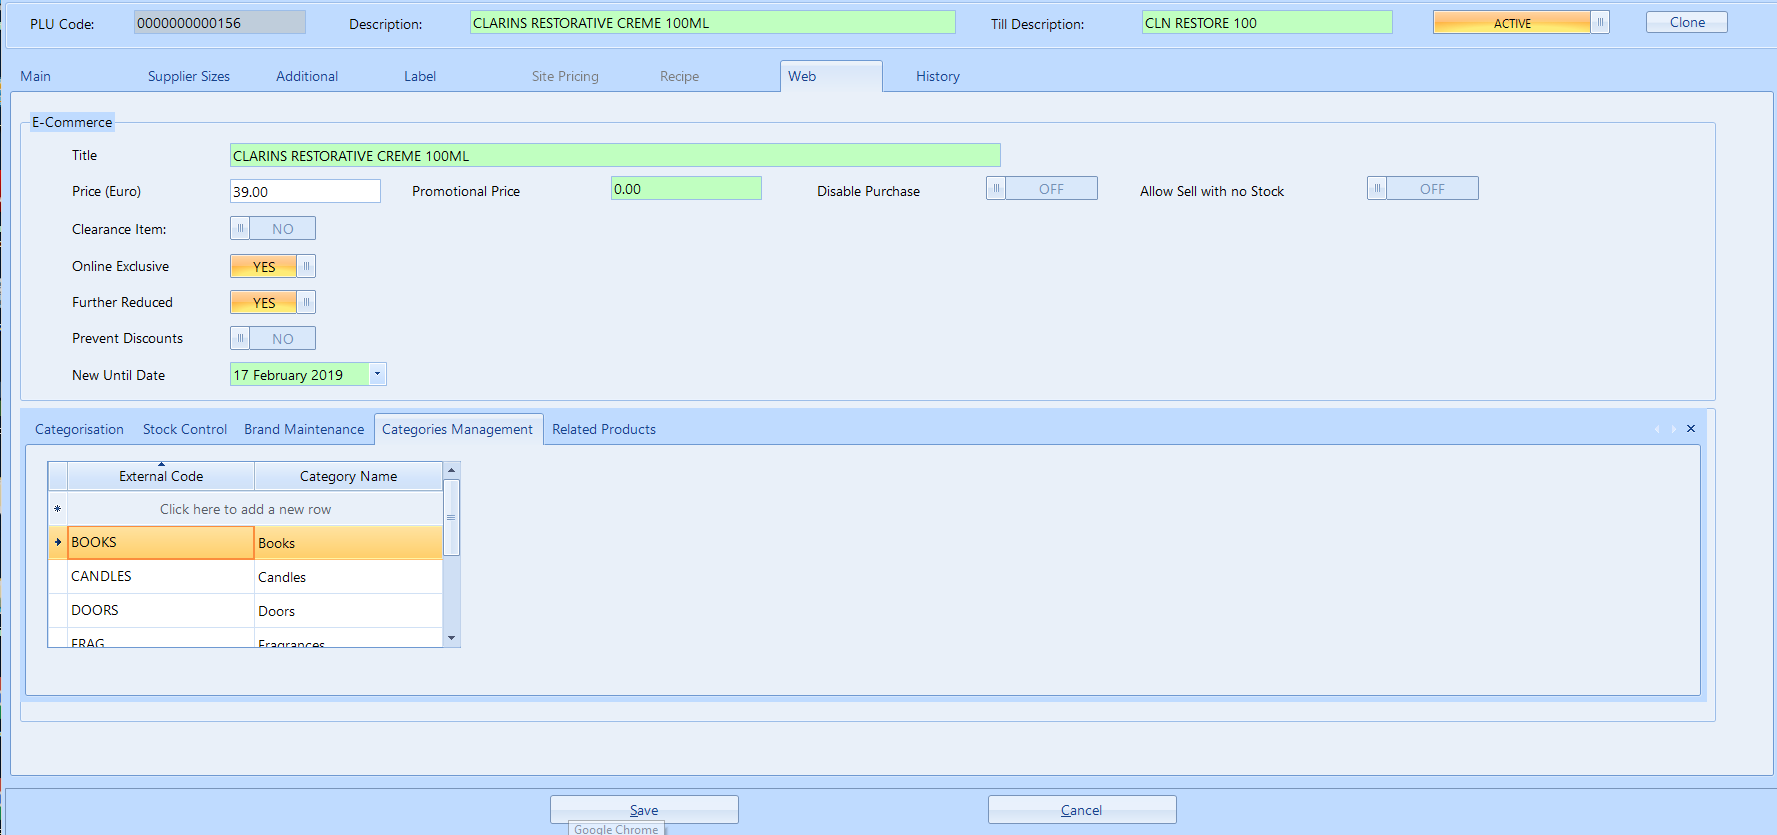
- Click here to Add a New Row
- Enter an External Code, this must match the Category External Code created at leaf node level in abcommerce
- Enter the Category Name
Customised Related Products List
A related product list is generated from the basket analysis nightly list however you can override this list and create your own Customised Related Product List.
Choose the Related Product Tab
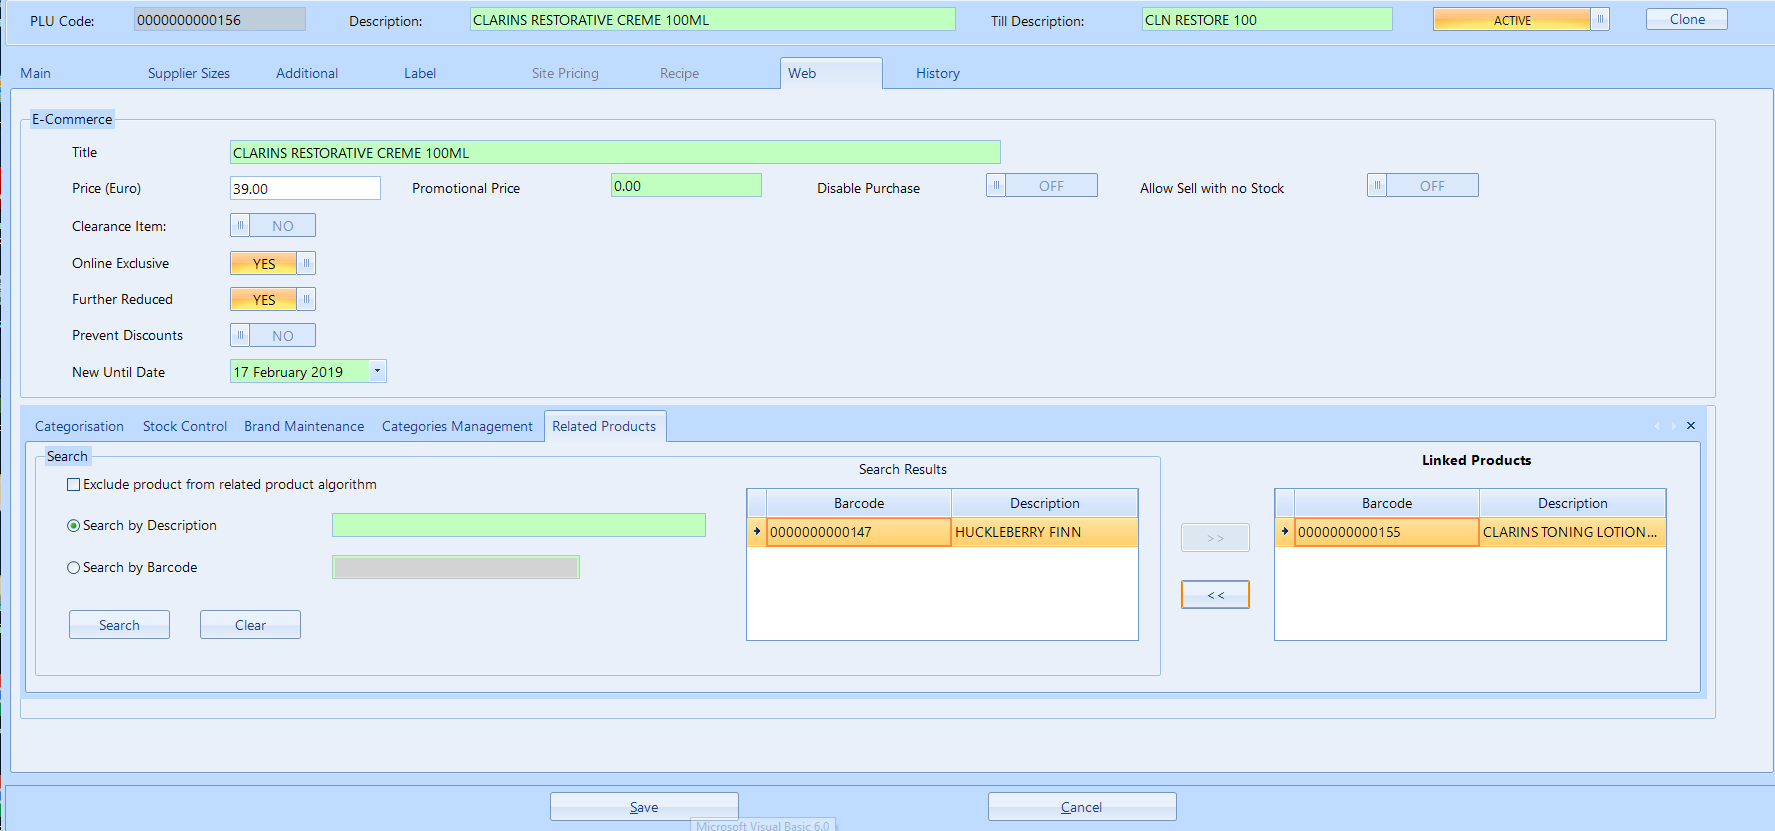
- Search for possible related products by description or barcode
- Choose the relevant products and move them from Search Results to Linked Products to create a Custom List. You can also remove products from the Custom List by moving them back to Search Results.
- You can choose to exclude the product from the related product algorithm so it does not appear in the nightly basket analysis
Comments
0 comments
Please sign in to leave a comment.